It’s time for another network tutorial and this time I’ll be showing you how to run ads with Bidvertiser. To be honest, it’s been a long time since I heard about Bidvertiser yet I had not tested their traffic until recently. There are just too many networks to run ads and we can’t master all.
However, I was contacted by them a couple of months ago and I decided to give it a try. To my surprise, one of the first campaigns I launched there started receiving conversions the same day, so I tested a few more and everything looks good. Bidvertiser is going to be one of my go-to networks when scaling campaigns from now and on!
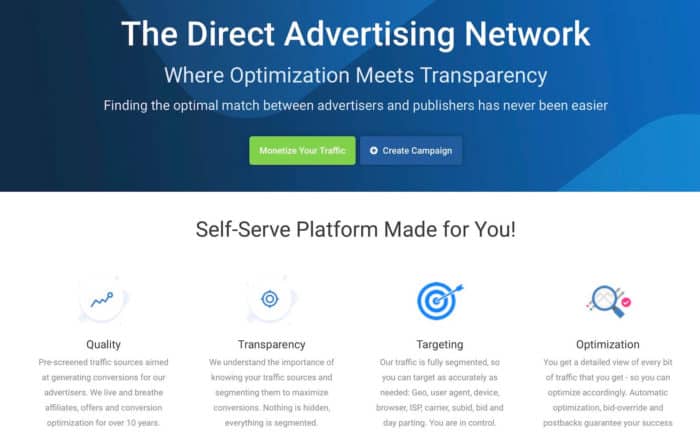
Bidvertiser allows you to create pop-under, direct link, native, and push notification campaigns. I’m familiar with all these types of traffic so adapting wasn’t an issue at all.
First, you’ll need to add some funds. If you want to test their traffic, Bidvertiser is giving away an exclusive coupon for my readers if you add the “SILVA50” code when adding funds:
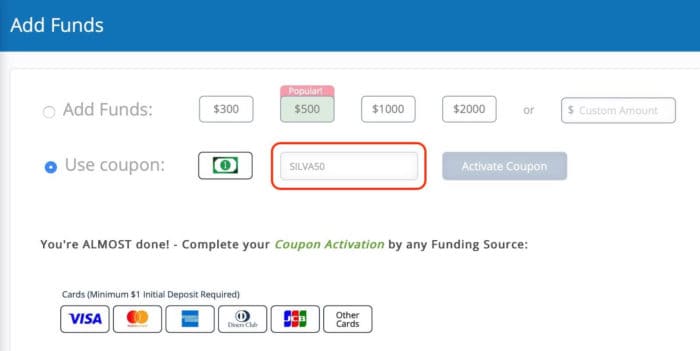
You can deposit via PayPal, CC, Cryptos, Webmoney, Payoneer and Wire transfers.
You’ll need to make a deposit to activate your coupon, and you can use any preferred payment method, but the deposit needs to be of at least $1 if you’re paying via CC or $100 if you’re paying with other methods. That’s right, you deposit $1, and get $51 to test if you pay with a credit card!
Make sure you hurry up because the coupon is limited and might expire soon!
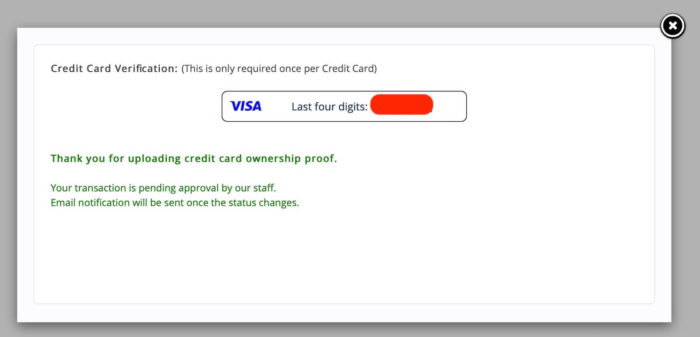
In case you’re adding funds via credit card, just keep in mind you’ll need to validate it by typing a specific number that appears in your bank statement. This can take 24-48 hours, but don’t worry.
Once you’ve validated your payment method and added your $51 or more to test their traffic, it’s time to create your first campaign. The process with Bidvertiser is quite easy and straight forward, but let’s go over it quickly and I’ll give you my personal recommendations.
If there’s one thing I’d love to see though is a new interface as it looks a bit outdated, but it’s an in-house platform and it works as intended plus you have a ton of options to optimize your campaigns down the road.
Bidvertiser review – creating your first campaign
First of all, when you create a new campaign you’ll be asked to select your ad format and device. From the available ad formats you can choose:
- Direct ads (a mix between links, typos, and domains)
- Pop-unders
- Native ads
- Push notifications
- Contextual pops
Contextual pops are highly targeted pops based on keywords or domain names. Instead of running RON campaigns and blocking websites, you’ll end up targeting some websites or keywords only with higher quality although lower volume.
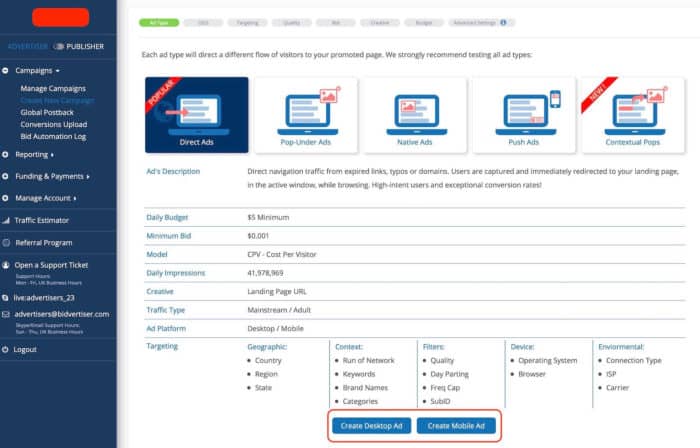
If there’s something I like about Bidvertiser is the way they make you choose if you want to target desktop or mobile users. This way you won’t be able to target both in the same campaign, which is a good practice because bids are different most of the time, and the optimization process is harder if you mix everything.
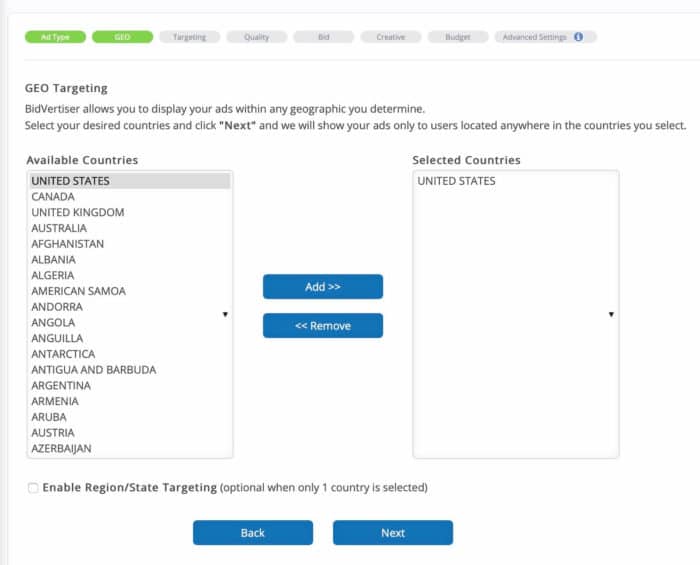
Once you’ve selected your ad format and device type, you’ll be asked to select the geos you want to target. As usual, I recommend just targeting 1 geo per campaign unless you’re testing a super-wide offer or a SmartLink:
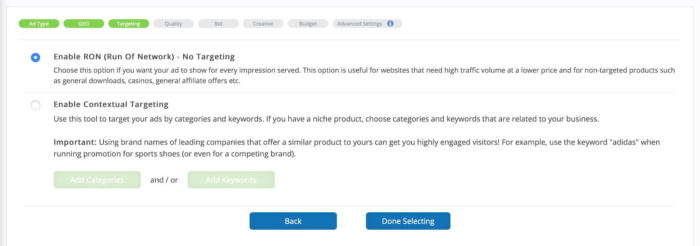
After that, you need to select if you want to run a RON campaign without targeting, or a contextual campaign. This only applies for direct or Pop under traffic though. I prefer to focus on RON campaigns and block websites though.
After that, you can select the quality score of the websites you’re targeting. Higher quality websites tend to have lower volumes and higher bids, so plan accordingly. In my tests, unless you’re very low on budget or just want to target a super high bid website, I prefer to target them all.
Unfortunately, there isn’t a tracking token to see which ones are performing better with your tracker. Otherwise, this feature would be much more useful…

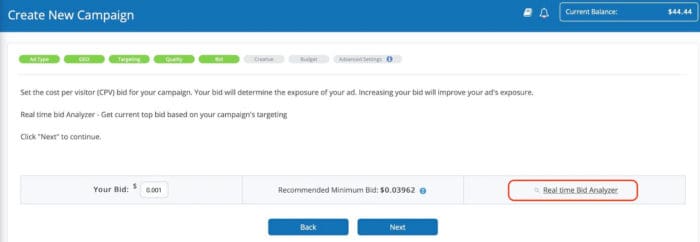
After that, you’ll need to select your campaign bids. Bidvertiser will show you some recommended minimum bids to get started, but there’s also a real-time bid analyzer in case you want to see what’s going on in real-time. I have found the minimum recommended bid more accurate in terms of grabbing volume though, so test carefully and see what works best for you.
Finally, we’ll be able to input your campaign URL in the creatives and give it a name. Your campaign URL should have all of the tracking macros to optimize with data later. I’ll show you how we use them with Voluum below.
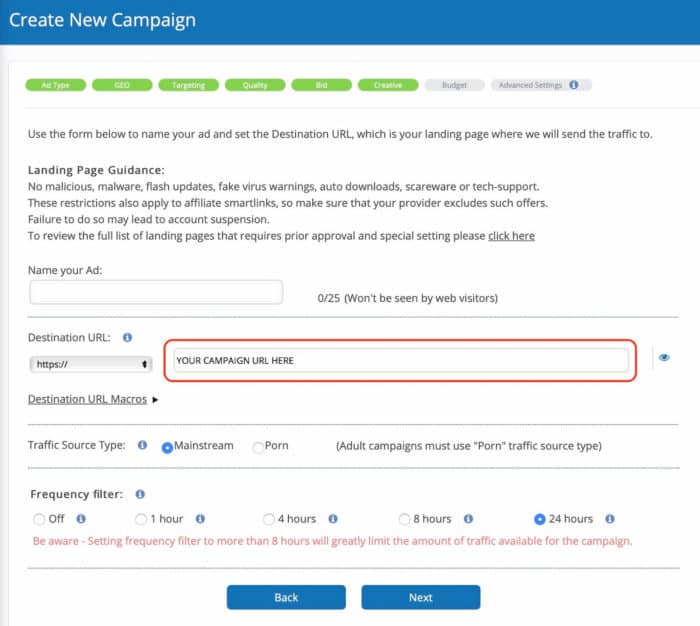
You can also select if you want mainstream or adult traffic, and the frequency-filter which I always set at 24 hours unless my campaign performs well (try 8 hours if that’s the case).
Finally, you’ll have to set a campaign budget. Choose a daily budget based on your offer payout and click next. $5 per day is the minimum budget you can set at Bidvertiser.
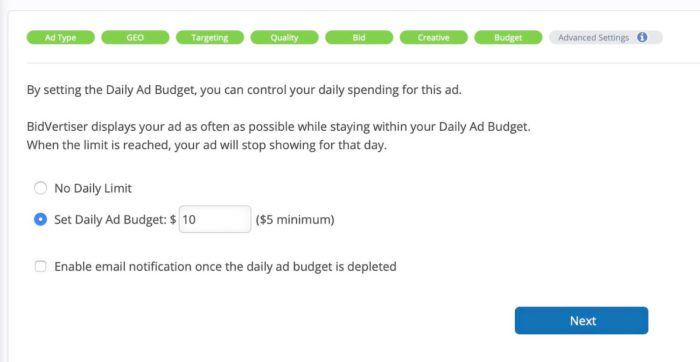
Once you’ve done this your campaign will be sent to moderation and start running in 24 hours or less. Here’s how I set up my tracker (Voluum) with all of the tokens available from Bidvertiser:
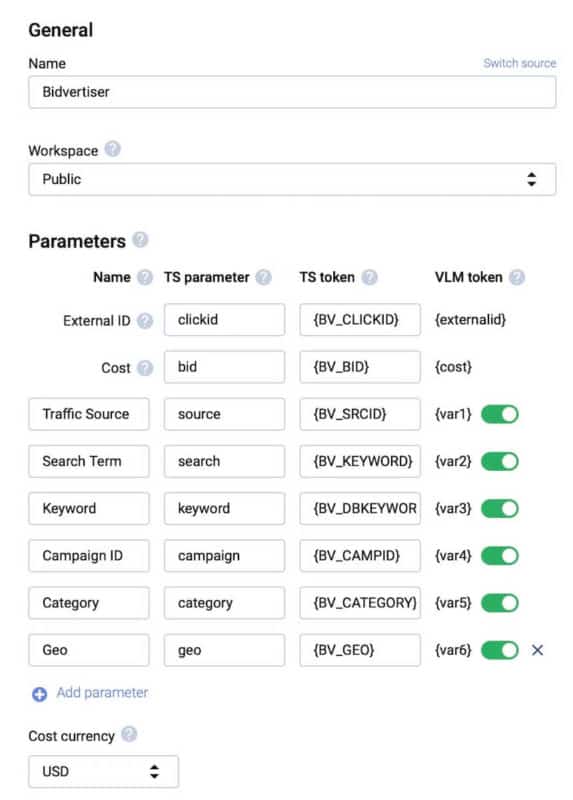
You can also set up a postback URL in your tracker to send your conversion data back to the traffic source. That’s up to you. I’d recommend doing so if you want to optimize your bids by CPA or if want to automate your blacklists based on the number of conversions.
Bidvertiser review – Optimization
Optimizing your campaigns with Bidvertiser is easy if you’re familiarized with any similar traffic source. The most important factor to optimize are the websites sending traffic to your offers, which are tracked as traffic sources within Bidvertiser:
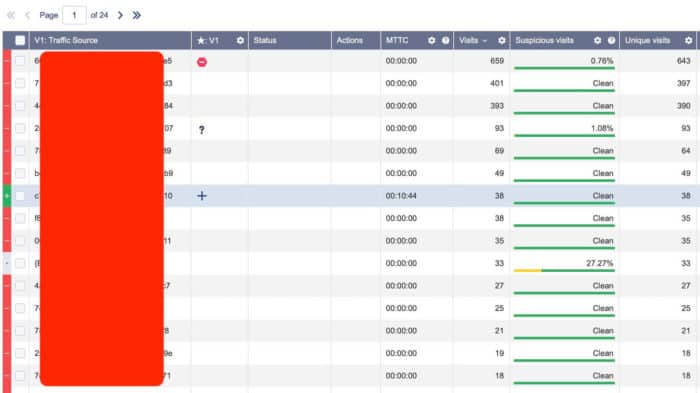
I usually block any website that has spent 1.5x the offer payout without any conversions. I also block quickly any traffic that looks like bots using Voluum’s AFK as explained here.
A second parameter I tend to check is the category token. Any category that spends 3-5x the offer payout without conversions ends up being blocked. If a category is unprofitable but still has conversions you might want to check the websites inside the categories to see if you can optimize it or not.
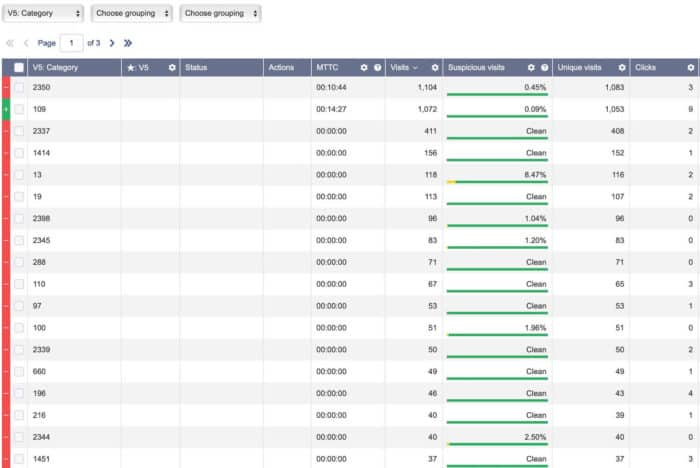
In your Bidvertiser’s reports dashboard, you can sort traffic and data based on websites, categories, OS, keywords (if that applies to your campaign) and more.
For example, with the categories, you can see which ones are converting and what’s the vertical of that category to get more insights about why it’s performing well or not.
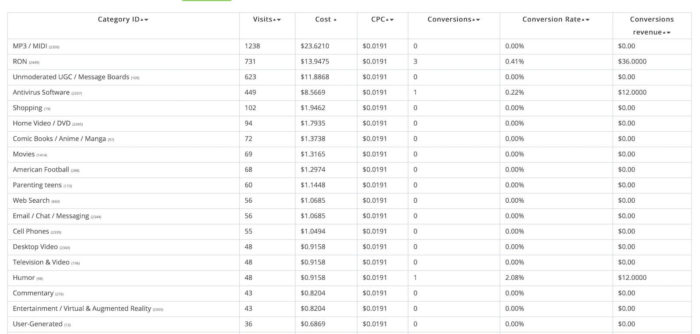
I prefer to check the rest of the data, such as OSes, browsers, ISPs, etc. with my tracker and optimize accordingly. If you want to optimize any factor just go to your campaign’s dashboard and click the “settings” wheel.
A new menu will pop up with tons of parameters to optimize, including targeting (for categories), OS/Browser, carriers, sub-id blacklisting (for websites), etc.
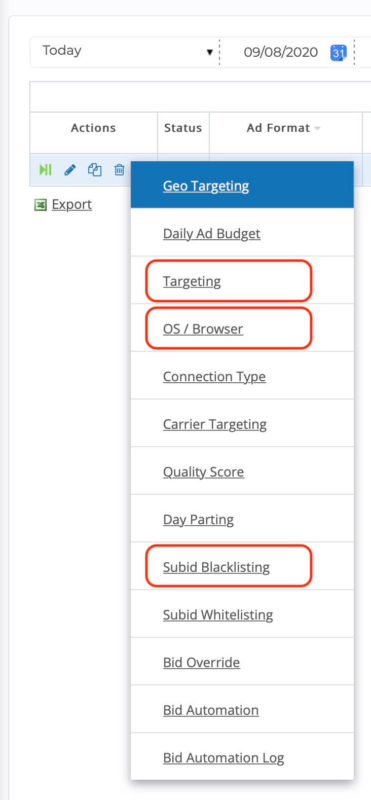
Keep in mind you can blacklist or whitelist websites from a campaign, but you can’t do both at the same time. If you start adding websites to a whitelist, the blacklist will be ignored.
You can also optimize your campaigns by bids or dayparting, and adjust your daily budget in case you want to scale up your campaign.
And this is pretty much how I optimize campaigns with Bidvertiser. So far we’ve been focusing on direct and PopUnder campaigns, but I’ll test their push traffic and native ads soon.
Remember you can sign up here and If you want to test their traffic, Bidvertiser is giving away an exclusive $50 coupon for my readers if you add the “SILVA50” code in your first deposit.
Make sure you hurry up because the coupon is limited and might expire soon!
That’s all for now. Talk to you in the next article! Leave any questions and comments below 🙂
hey servandosilva
i tried bidvertiser with survey finance offer from zeydoo
even i used the global postback from bidvertiser i can’t see conversion in my tracker ( they appear in cpa network) do u have any idea about where is the probleme
HI , servandosilva
what types of offers you recommend that is working well with this traffic source
Sweepstakes, App installs, downloads, dating.
Hello Servando. I hope you are well.
I would like to know what you recommend more at this time with a budget of $ 2,000 USD, Pop Traffic, Redirect or Push Notification or which other you recommend to run CPA offers. I would also like you to tell me some traffic sources that you recommend starting a campaign from scratch.
Thanks for your time.
Hi Carlos.
Any of those are good to get started. Redirects have good quality but less volume. Pop has more volume but lower quality and push is a mix between them.
Focus on 1 ad format only and if possible in just 2-3 sources maximum with that budget.
Regards.