RichAds is an ad network with advanced auto-optimization algorithms, specializing in push, pop, calendar, in-page, and direct click traffic. The company offers high-quality traffic from over 220 GEOs.
In this review, we will cover the advantages of RichAds, its registration and campaign setup procedures, and the bonuses the ad network has in store for its partners.
Let’s get started!
RichAds: advantages and features
RichAds possess several key advantages that inspire trust for them among webmasters:
- Large volumes. The number of RichAds unique daily impressions exceeds 5 billion;
- Wide choice of GEOs. The ad network works with more than 220 GEOs all over the world, increasing its volumes even in less popular regions;
- Quick moderation. Moderators here work 24/7 and check ads within 10-15 minutes. The rules aren’t strict, as long as you don’t promote drugs or alcohol and avoid shock and mature content in your creatives;
- Convenient traffic segmentation. All the traffic is divided into 4 groups, which differ in price and efficiency. For example, Premium traffic is 61% more efficient than other types of traffic;
- Flexible creatives policy. You can upload creatives in bulk – up to 10 at a time, and if you run out of ideas for promo materials, you can request custom creatives from our managers;
- Advanced optimization tools. RichAds uses advanced optimization solutions such as Target CPA, Automated rules, and others. For example, Target CPA sorts publishers based on ad performance and automatically adjusts the bid to bring it closer to the desired value. This way, you can achieve even 300% ROI.
RichAds has many advantages. If you want to see them all in practice, look at the next section, where we show you how to register on the platform and set up your first ad campaign.
How to work with RichAds?
Let’s figure out how to register with this ad network and launch a campaign.
Registering
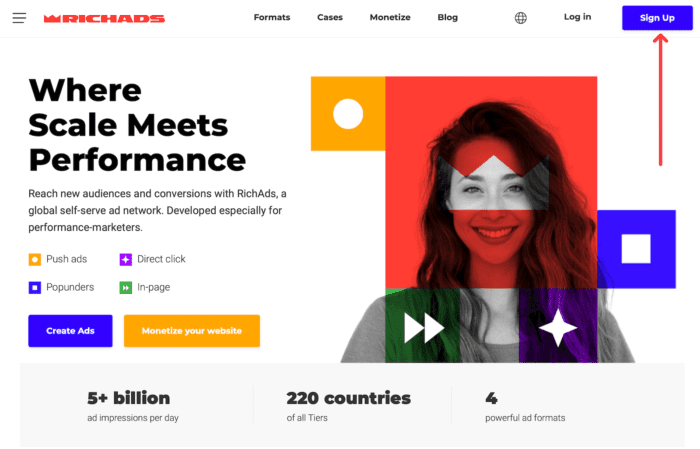
Click “Sign Up” on the homepage to start the registration procedure.
You’ll be redirected to the registration form. Enter your email, make up a password, and leave some instant messenger contact info and your experience with push notifications and pops. The latter is needed to personalize the support of your future manager.
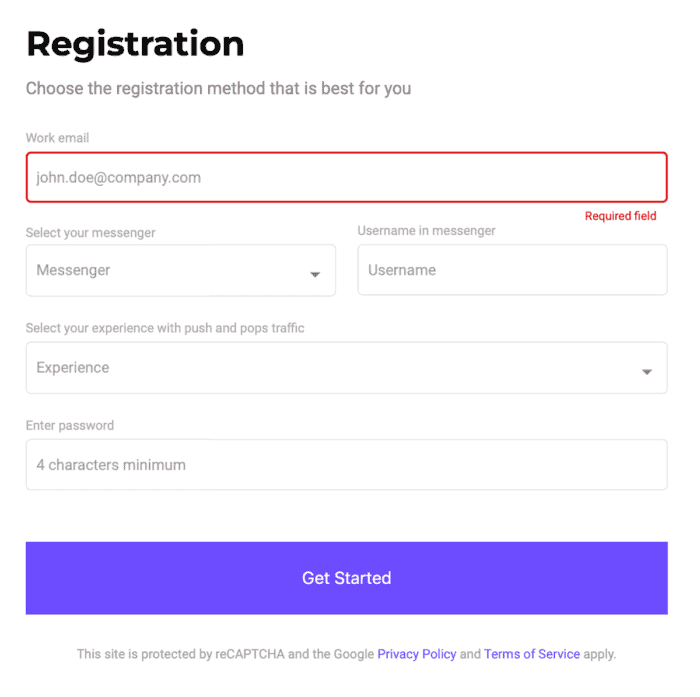
After inputting all the data, click “Get Started.”
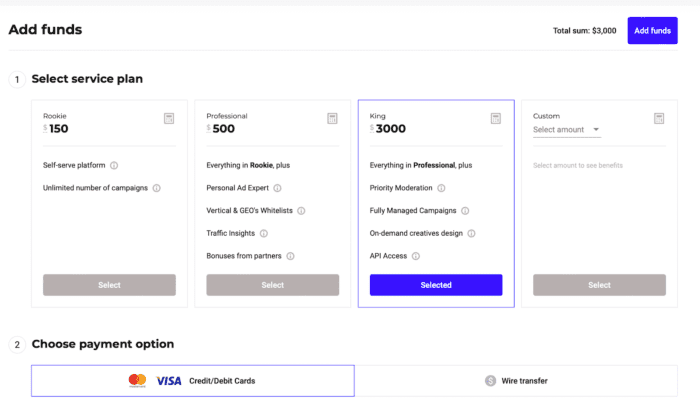
The last registration stage is choosing the type of account you’ll have. They have different annual spend and deposit limits as well as specific features. There are 4 account types in total:
- Rookie. Mandatory spend level – at least $150. This tariff plan includes all the ad network’s basic features like the ability to create an unlimited number of campaigns;
- Professional. Spend level – at least $500. This plan enables you to request whitelists and expert expertise as well as claim partner bonuses;
- King. Spend level – at least $3.000. In addition to the mentioned features, this plan provides access to API, priority moderation, and the ability to request custom creatives;
- Custom. This option is for affiliates that failed to find a suitable plan. Just enter your monthly spend level, and RichAds will show you the advantages your account can get.
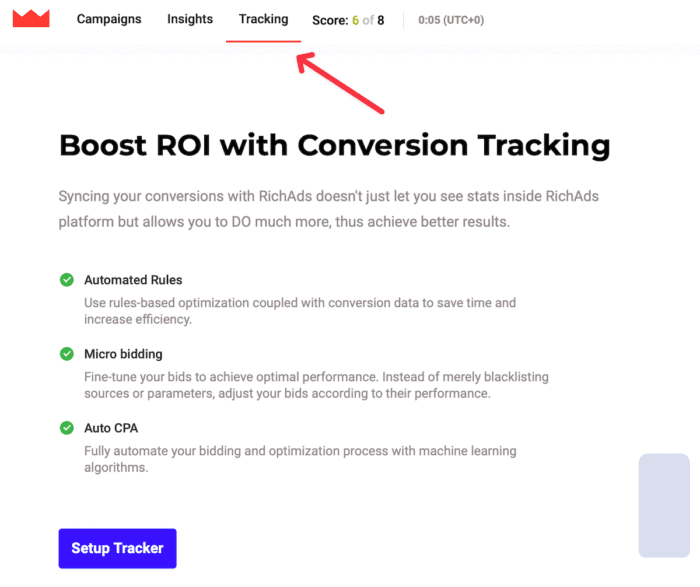
That’s essentially it for the registration procedure. But to access all the ad network features, you need to set up postback and connect a tracker. You can do this in the “Tracking” section in the upper menu. If you have any questions – contact your manager, and they will show you how to connect a tracker or go to the special section in the RichAds blog.
After setting everything up, you’re ready to launch your first ad campaign. Let’s cover how to do that.
Launching a campaign
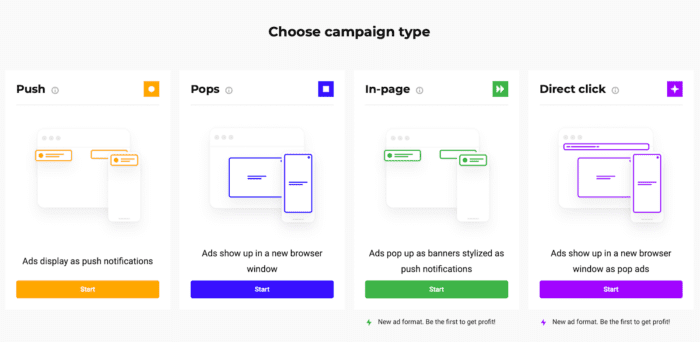
For starters, you need to choose a type of traffic. There are 4 options in total:
- Push
- Pops
- In-page
- Direct click
1. First, you should choose an optimization strategy. You can set it manually or use Target CPA, an algorithm that sorts publishers based on performance. You can read more about the algorithm here.

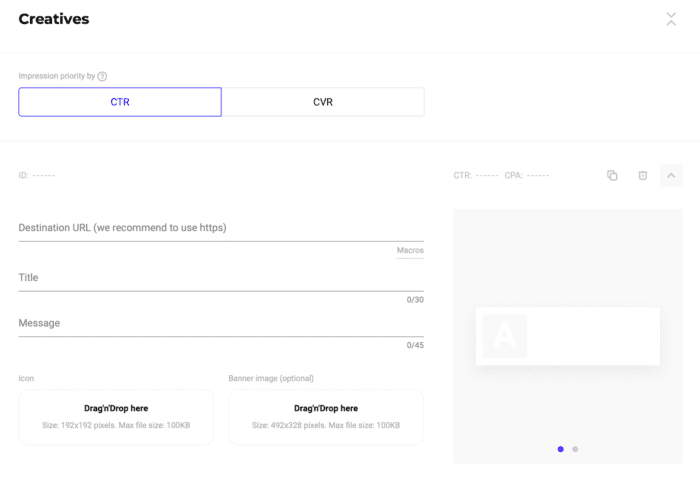
2. The next step is setting up creatives. First, set the priority between the CTR and CVR. RichAds will show the most clickable ads more often if you choose the CTR. And if you select CVR, the creatives that bring more conversions will be the priority.
Next, you must enter the title and content (if we are talking about push notifications) and the landing page URL and add images. In the window on the right, you can see the previews.
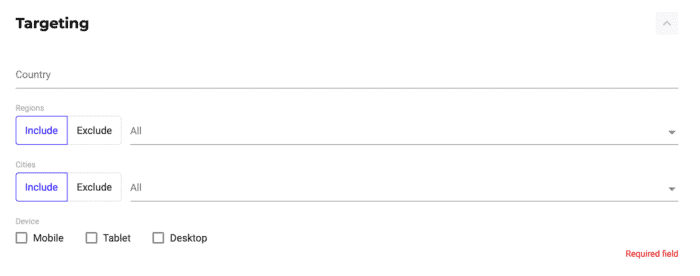
3. Next, set up the targeting. Enter the country, regions, and cities in which you plan to display ads. This section can also specify the device type and set user impression and click limits.
4. Then, choose your CPA goal in the “Goal” tab. Select your objectives and the optimal TA price. You can choose between conversion, approved conversion, and landing page.

5. In the “Budget” tab, set up how the ad network should manage your funds. You can set a daily budget or choose the unlimited option and pick an ASAP or Even strategy. The former’s goal is to spend the budget as quickly as possible, and the latter’s is to spend the funds evenly.
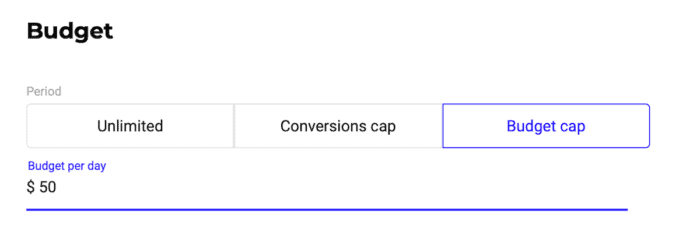
That’s all for the setup technically, but RichAds offers a couple more setup features. You can find them in the bottom left corner.

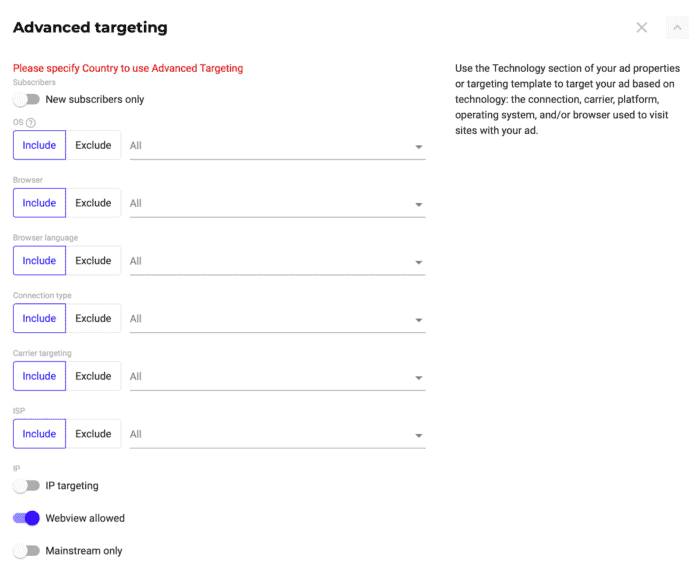
6. In the “Advanced targeting” tab, you can fine-tune the promotion process: select browsers, languages, OSs, the connection type, and other options in this section.
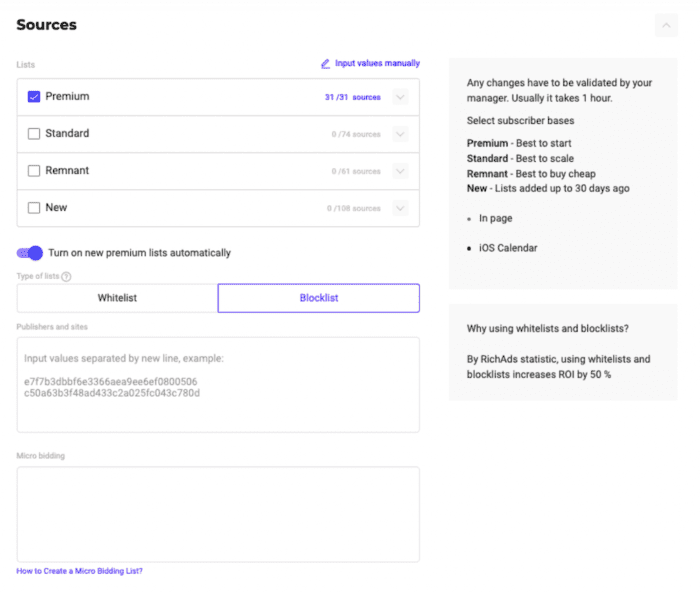
7. In the “Sources” tab, you can select the type of traffic you want to use. You can also set up publisher black- and whitelists. You will find the “Micro Bidding” feature at the bottom, which is needed for targeted bid adjustments. You can read more about it here.
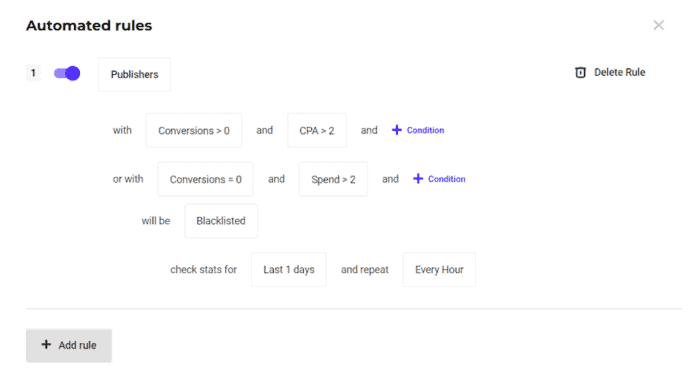
8. The next section is “Automated Rules,” where you can set up auto-rules. Using this, you can, for example, compile blacklists of publishers by adding poorly-performing websites to them. You can read more about the feature here.
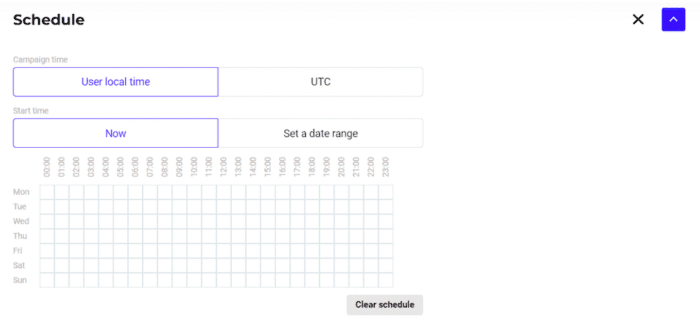
9. And the last section is “Schedule.” Here you can set up time targeting and the time when the campaign will launch and stop.
And that completes the setup!
Fill out the forms and click “Create,” You will submit the campaign for moderation. Once the campaign is approved, you can track the results in the “Tracking” tab.
RichAds bonuses
The company regularly holds promotions for its partners. You can learn more about them in the “Bonuses” section of your personal account:
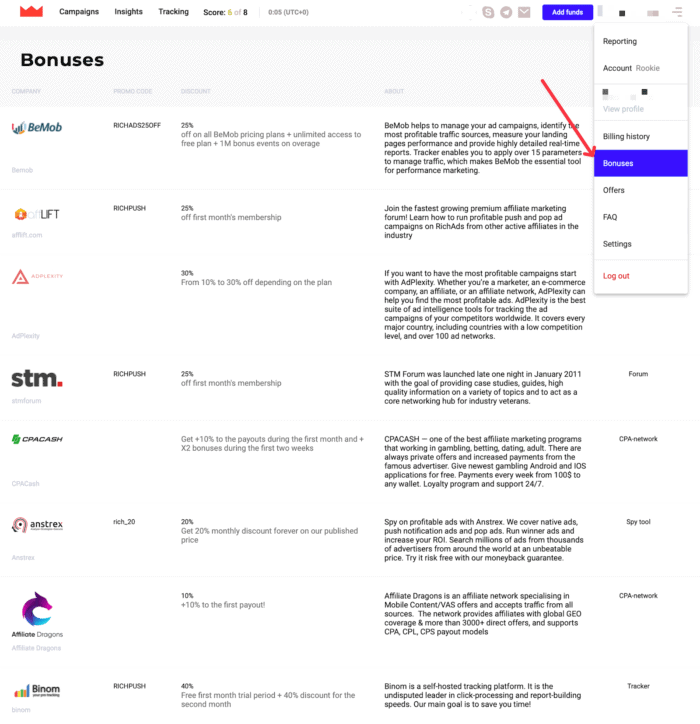
Also, RichAds has a referral program – you can get a bonus for your balance worth 5% of the first deposit made by each person you refer.
And for our readers, RichAds have prepared a special bonus – enter the promo code “SERVANDO” and get +10% off your first deposit!
In conclusion
RichAds is one of the largest providers of Push, Pop, Calendar, In-page, and Direct click traffic on favorable terms, a user-friendly ad account, and advanced algorithms. Now you know how this ad network works, meaning it’s time to test all its advantages in practice!
Nice post