After buying PPV traffic for 6 years I’ve tested many traffic networks out there. Some of them have great traffic, some networks have very bad quality and some networks don’t even exist anymore.
I’ve been actively buying traffic from Adsterra since 2015 after a recommendation of a good friend back in the day and so far in 5 years I’ve been very pleased with how they work, the traffic quality, volumes, and my manager’s customer service.
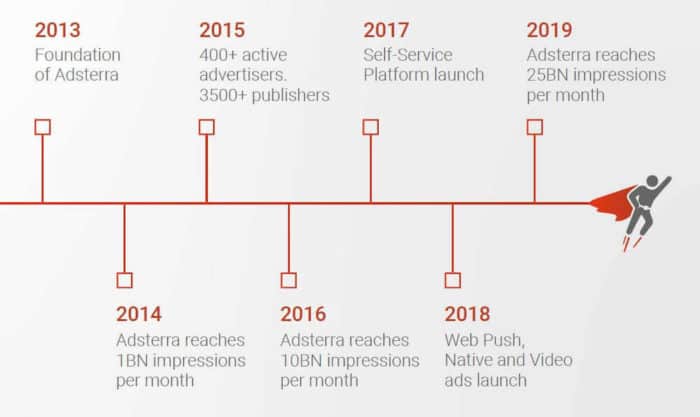
Adsterra was founded in 2013 and now offers more than 30 billion impressions per month (2020).
Ad formats and payment methods
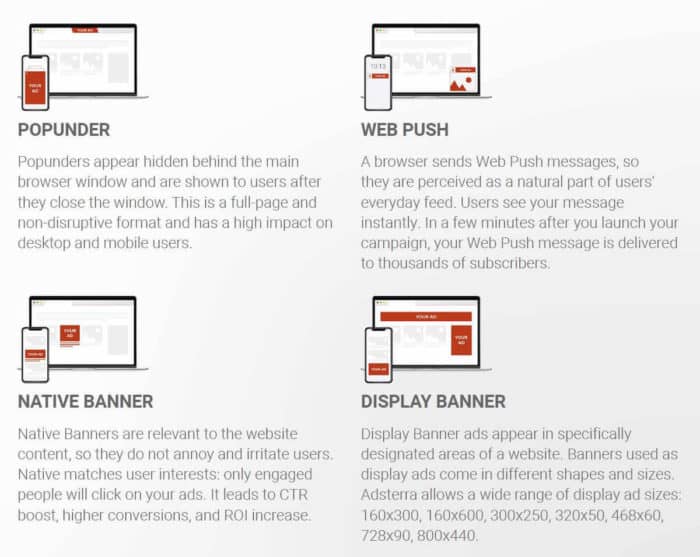
Adsterra started with popunder traffic but has been scaling out to other ad formats including native banner ads, regular display ads and web push notifications, as many other networks do as well.
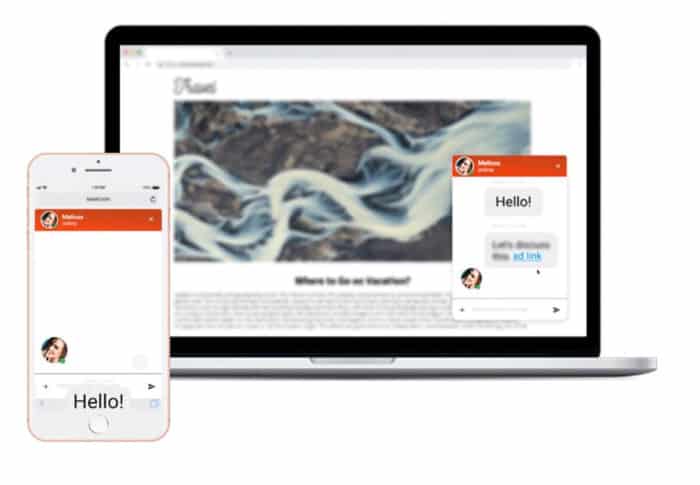
But their most recent addition with a very interesting approach is called “Social bar“. This new ad format is totally new and I’ve been testing it for a few days only, however, it’s more like a mix between different ad formats including in-page push, a chat, and a video/banner at the bottom or top of the screen.
Basically it works as a page notification, but with different formats to increase the CTR besides the regular in page push format every other network is adding recently.
Here’s how it looks in the format of a chat notification:
Adsterra told me this new ad format gets around 20 to 30x more clicks than regular push notifications. I decided to buy some traffic and test it on one of my websites as well to find out how it worked, and I averaged a CTR between 5% to 10%. Considering regular push notifications can get CTRs as low as 0.1%, I’d say the new format works wonderful.
However, the market tends to adapt quickly. We’ll see how it works for the rest of the year. It’s a great way to get some traffic and low pricing right now though!

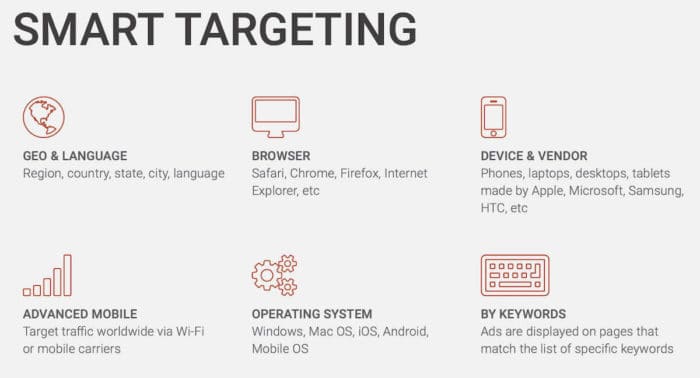
Moving into targeting and other settings, Adsterra allows you to launch campaigns with different filters including geo, browser, OS, devices, connection type, etc. The user interface on their SSP (Self Service Platform) is very simple and straightforward. We’ll have a look at it down below.
Here are some of the verticals that work well with Adsterra:
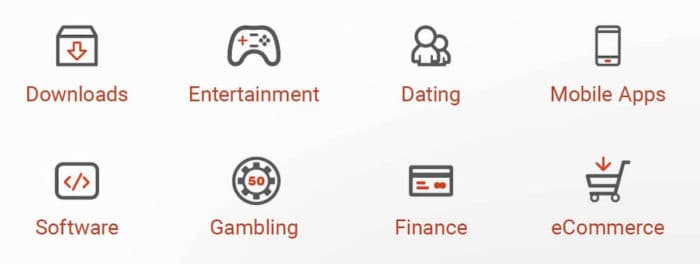
We have actively promoted many of them, including downloads, dating, mobile apps, software, and gambling with Adsterra in our 5 years, so I can assure you those verticals work.
Sign up with Adsterra here and get started!
BONUS: Get an extra $50 in your next deposit when you add the code WPT4V94B in the check out page.
The coupon is valid once for new and old accounts, but you need to add $160 or more to your balance to apply. That is, you deposit $160 and get $210 in total.
This coupon will be available until September 30th. Use it wisely!
Once you sign up as an advertiser, the first thing you’ll need to do is to add some funds to launch your first campaign.
Adsterra accepts the following Payment methods:
- Paxum
- WebMoney
- Bitcoin
- Yandex
- Credit Card
- QIWI
- Wire Transfer
- Capitalist
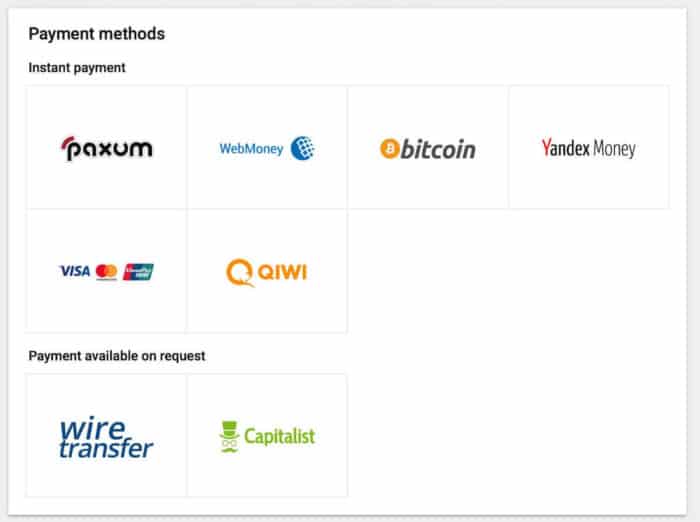
Perhaps the only payment method I miss from this list sometimes is PayPal, but there are many other options around, including cryptocurrencies such as Bitcoin which aren’t common on other traffic sources.
BTW, it’s been a recurring question in the forums so I wanted to mention it here. Adsterra along with many other networks might ask you to send details of your personal ID and even a photo with parts of your credit card before approving your payment method.
This is known as KYC (Know your customer) and it’s something that has been growing in many websites lately, so don’t be scared about it in case it happens to you.
Adsterra Review – Launching your first campaign
Let’s launch a campaign with Adsterra to see how it’s done!
First, I’d recommend you to get yourself a tracker if you still don’t have one. I use Voluum and it’s the tracker I’m going to show you in the following screenshot:
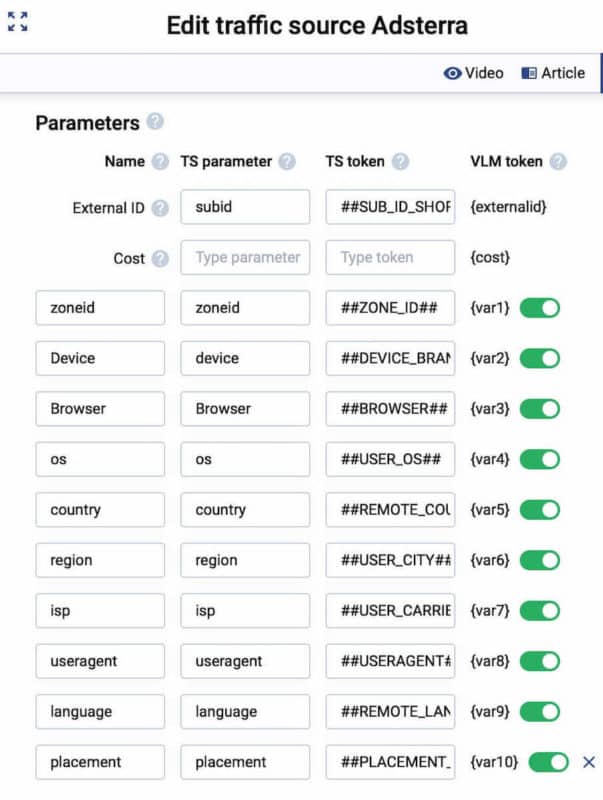
Make sure you add all of the tokens correctly into your tracker. The most important token for me here is the Placement token. That’s the filter I use to optimize my campaign and block all of the websites that aren’t performing.
The rest of the tokens aren’t very useful to me, mostly because I can see all the data in my tracker, but they are nice to have as sometimes the data isn’t completely accurate between the tracker and the traffic source.
I’d love to have a cost token as well to track everything on auto pilot, but so far it’s not possible.
Now that you have added Adsterra as a traffic source on your tracker. You’ll need to set up your postback URL. This is super handy to optimize your campaigns, and completely necessary if you want to run campaigns with a CPA bid on Adsterra.
Adsterra has an easy to set up guide for postbacks. You just need to select the type of postback you want to add (I chose “simple”) and then your tracking system. Voluum and Binom are already there. You can also add a Hasoffers or Cake postback if you’re running without tracker (not recommended) or simply add a custom one if you’re using anything else.
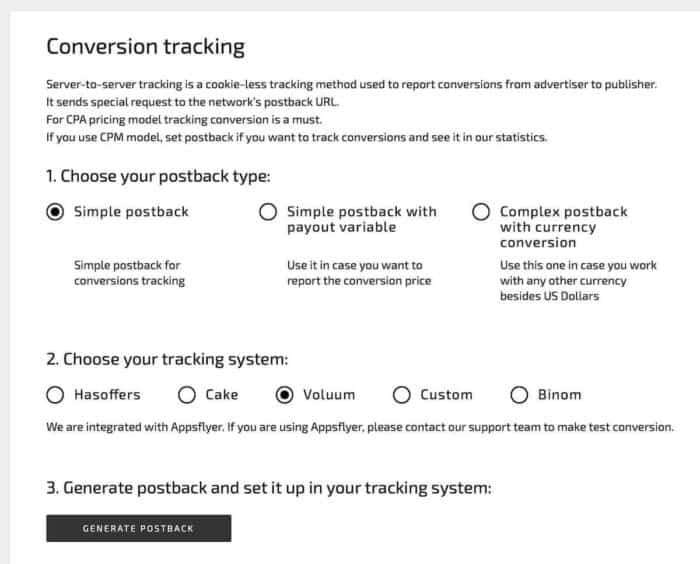
After selecting a tracker, click the “generate postback” button and you’ll get your own postback so you can add it to your traffic source template. It couldn’t be easier!
Now onto launching a new campaign.
Click “create new campaign” in your dashboard and you’ll be presented with the following menu:
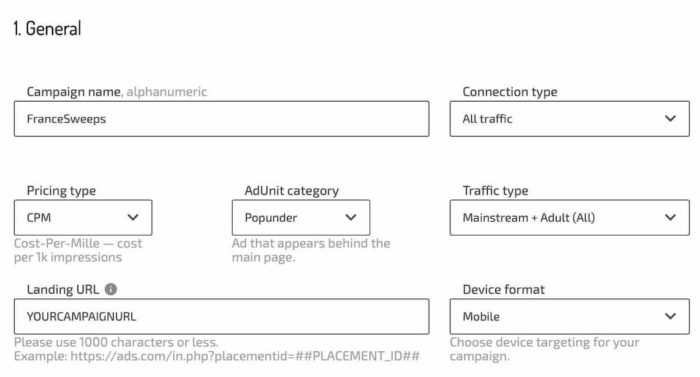
There, you will need to choose a campaign name, the connection type (Wifi, Carrier, or both), the ad format and pricing type.
Also, you’ll need to select if you want to buy mainstream or adult traffic, the device and input your campaign URL.
After that, scroll down and you’ll have to fill in the second part of the menu:
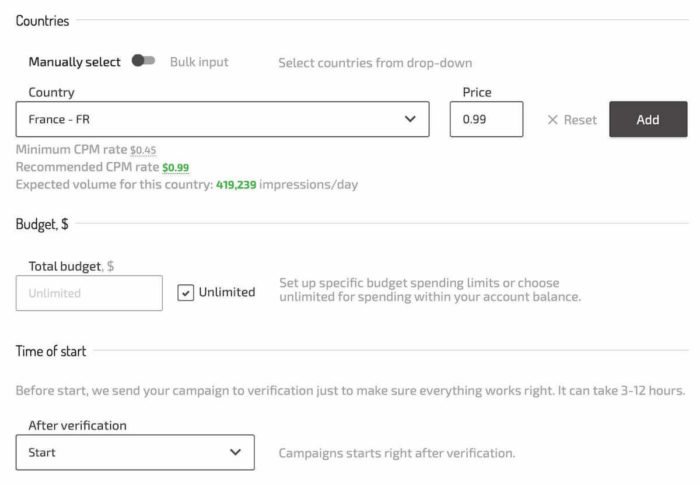
Start by selecting the country you want to get traffic from and you’ll get a recommended minimum and average CPM. An estimated number of impressions will appear after you’ve chosen a bid as I did in the image above.
As for the budget, I like to leave it unlimited for the campaign and control it at the daily limits which we’ll check later.
You can also select if you want the campaign to start after the verification or if you want to pause it right after the reviewal process.
Now scroll down and we’ll get to fill the targeting options:
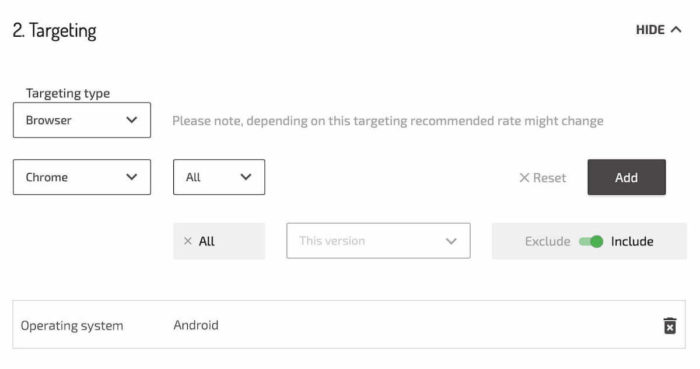
Besides the basic targeting such as Country, Connection, and device, here you can also select specific segments of traffic using filters like Operating System, Brand, Browser, Carrier, etc.
You need to add each of them separately, just like I did with Android in the Operating System menu.
After you’ve added all of the filters move down to the last section of the campaign creation menu, which is capping and limits:
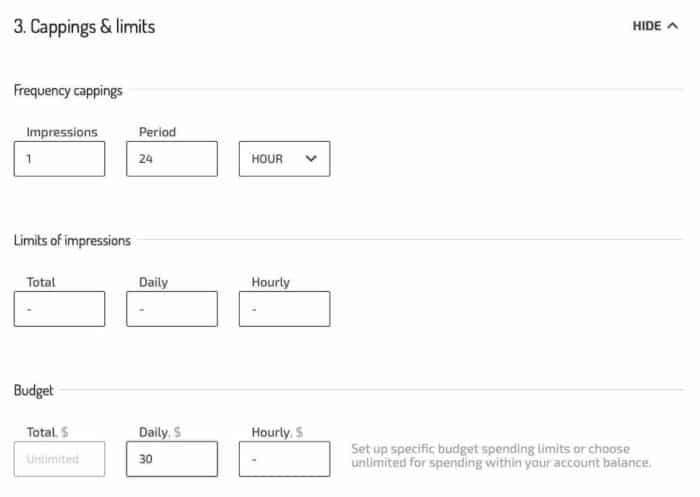
As a recommended setup, I always start by capping the number of impressions to 1 every 24 hours on pretty much every network. You can tighten or loosen up this setting later if your campaign performs well, but it’s a good way to make sure you’re reaching new users per day and avoid ad fatigue.
As for the limit of impressions per day, you can either limit your campaign’s ad spend by selecting a number of impressions or just by selecting a daily budget.
I prefer doing it by budget as I don’t need to calculate the number of impressions I want to pay based on the CPM, but it’s up to you to decide. Both filters work.
Finally, we get to the Advanced settings:
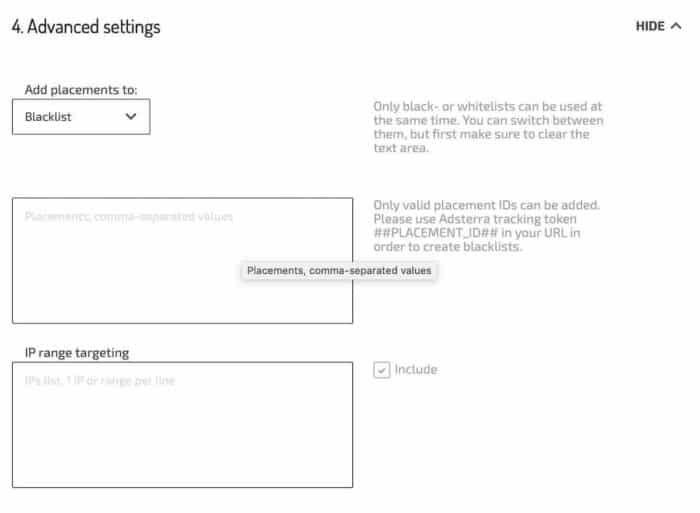
You don’t really need to do anything here if you’re testing a new campaign. However, if you’ve got enough data from running past campaigns and you want to blacklist or whitelist some placements or IPs, you can do it here and then quickly go to the review menu to send your campaign for approval.
In my case, I’ve seen approvals take 24 hours or less. Usually, I get my campaigns while I’m sleeping since Adsterra has their team in Russia and they’re in a European timezone while I’m on America’s timezone. Your milage may vary, but plan ahead of this if you’re desperate and want to launch campaigns fast.
Your manager will also be available via email or Skype, and they’re super friendly and useful in case you want some recommendations. They can also help you optimize your campaign as they used to do it all the time when Adsterra only had a managed service, but nowadays with the SSP you probably want to do this yourself.
Sign up here and get started.
Adsterra Review – Optimizing a campaign
Finally, here’s how a campaign that’s already working and profitable looks on Adsterra 😉
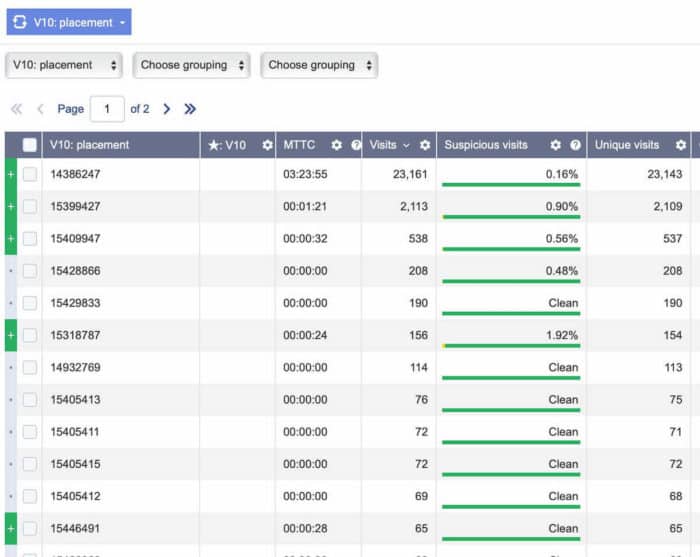
As I said before, I pretty much only check the placement IDs in my tracker and everything else I rely on my tracker to give me the stats (browser, carrier, etc).
After gathering enough data, it will be time to optimize your campaign and tweak your settings for the best performance! You cand find more info about how to get started if you’re launching your first campaign here.
Sign up with Adsterra as an advertiser here and get started ASAP!
BONUS: Get an extra $50 in your next deposit when you add the code WPT4V94B in the check out page.
The coupon is valid once for new and old accounts, but you need to add $160 or more to your balance to apply. That is, you deposit $160 and get $210 in total.
This coupon will be available until September 30th. Use it wisely!
Please let me know if you have any questions about this Adsterra review in the comments and I’ll talk to you in the next one!
Leave a Reply