2023 Update: SelfAdvertiser will be closing its platform on September 30th, 2023. Discounts, platforms, and links will be offline after that date.
Today we’ve got a tutorial on how to run push ads (+ a few tips) with SelfAdvertiser.
If you’ve been a long time reader I have reviewed SelfAdvertiser a couple of times before about their domain redirect and pop up ads.
However, as you can see the trend nowadays is to add push ads and SelfAdvertiser has just added them a few weeks ago (May 2019 in case you’re reading this later). We have decided to do a quick test on how to set up your push ads with Selfadvertiser, check the volumes and optimize your campaigns. All this including a coupon available for everybody no matter if you’re a long time user or a new customer in their platform.
Sounds good? Let’s get started!
SelfAdvertiser Push Notifications
As I mentioned, SelfAdvertiser just added a few weeks ago their push notification ads to the inventory. I know this traffic has been available for BETA testers for a while but it’s finally here and you can use it to scale and make more profit from your campaigns.
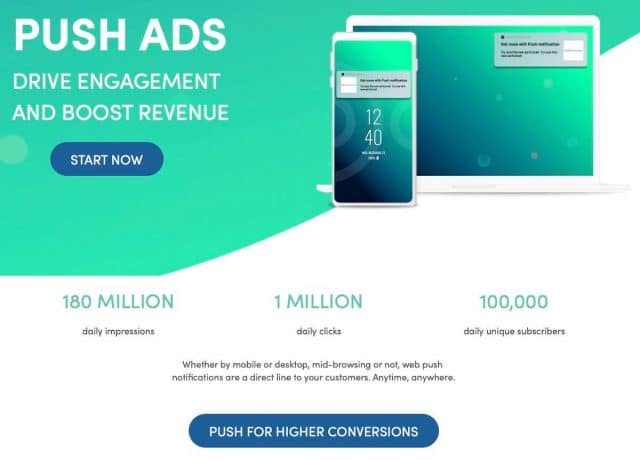
With close to 200 million impressions available per day and an average of 1 million clicks per month (your average may vary but that’s a CTR around 0.5%), SelfAdvetiser has good volume to help you with both mobile and desktop traffic.
The top verticals that work in SelfAdvertiser’s push ads are:
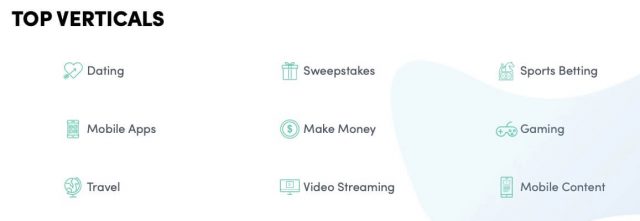
In my opinion, those are the same verticals that work on most other push notification networks and it makes sense. We focus on several verticals including “make money“, “betting” and “sweepstakes” and if you take a look around any push spy tool you’ll see most of the verticals mentioned above.
If you want to test their push notification traffic I’ve got a special coupon for you:
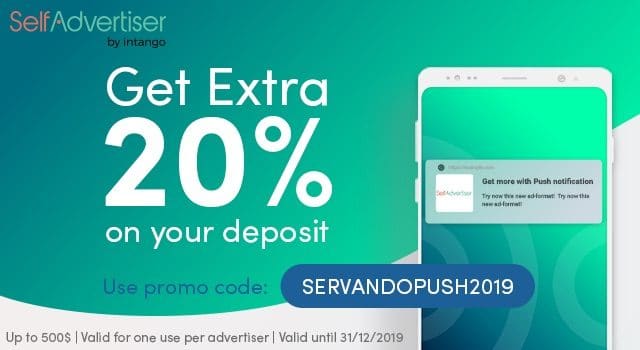
No matter if you’re a new customer or an old/experienced customer, you can use the bonus coupon to get an extra 20% in your next deposit while adding the code “SERVANDOPUSH2019” in the checkout process.
This bonus will expire at the end of the year (2019) and you can use it for a max amount of $500 (you get $600 using the coupon).
SelfAdvertiser’s minimum deposit is $100 (you’ll get $120 if you use the coupon).
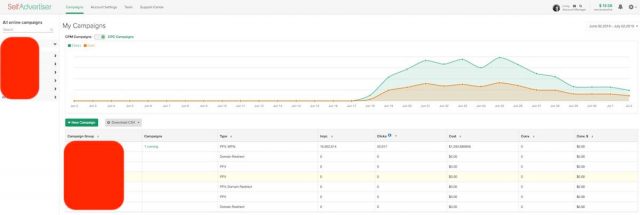
After adding funds to your account you’ll see your dashboard and once you create a push notification campaign you can switch the graphs between CPM (pops and redirect) and CPC (push notification) campaigns to check your data graphs:
If you go to the “tools” menu you can check the inventory available per geo and Operating System.
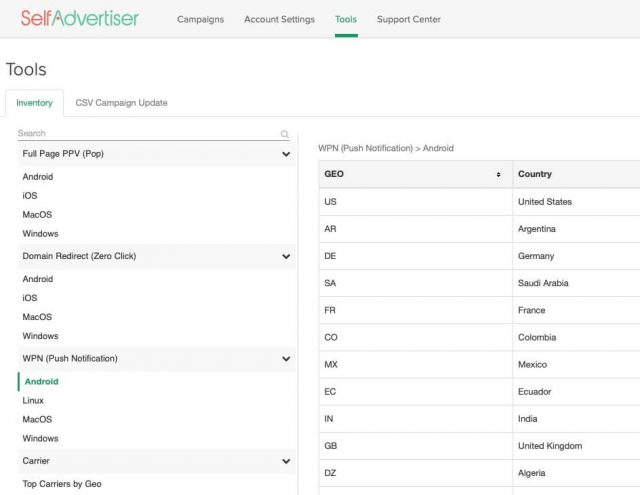
As always, I recommend focusing on Mobile traffic because that’s where the volume is at. Android has easily 10x more traffic than Windows in this case and so I launch most of my campaigns there. The tool will show you the number of impressions available per day and you can calculate the number of clicks you can buy once you launch a campaign and check the CTR stats depending on your creatives.
SelfAdvertiser Push – Creating a campaign
Creating a campaign with SelfAdvertiser is easy and straightforward. The user interface is easy to understand and has enough options to filter and optimize your campaigns without being overwhelming.
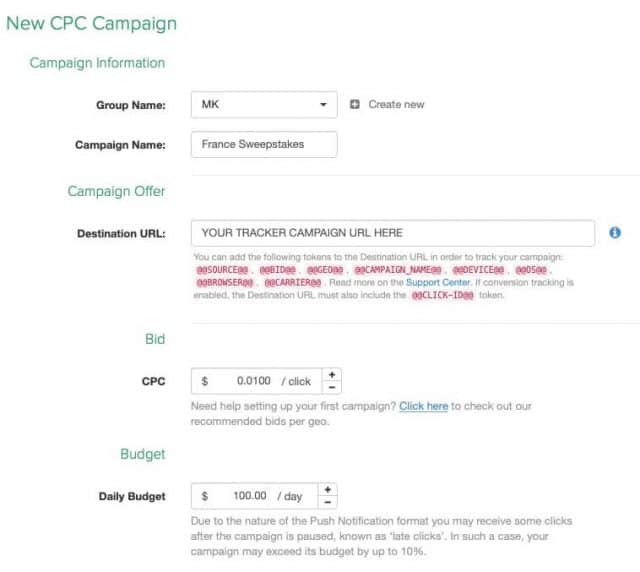
Once you click the button to create a new campaign from your Dashboard you’ll have to fill some basic information. Let me explain it with a few screenshots.
First, you need to set up a campaign name and group. You can name the campaign whatever you want and create a group in case you want to filter your campaigns by verticals, countries or whatever you prefer.
You also need to put the link of your campaign URL from your tracker which should already include the tokens available from SelfAdvertiser to optimize your campaigns (see below). Then you set up a bid (use recommended bid from the traffic tool or higher) and set up a daily budget.
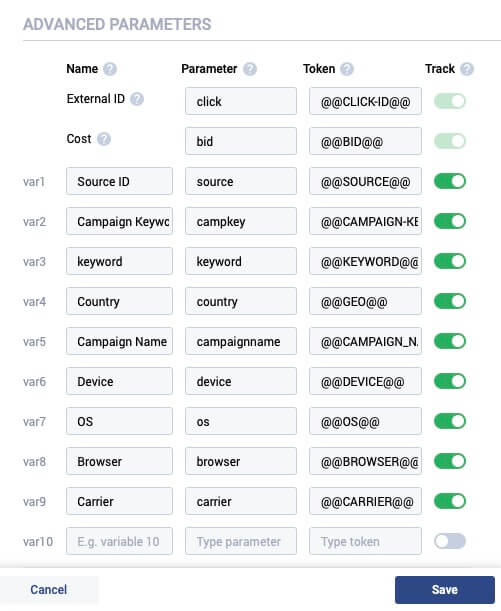
If you’ve got any doubts about how to set up your tokens in the tracker this is how I write them down in Voluum’s tracker. The only token there that doesn’t really work for push campaigns is “Campaign Keyword“, so either disable that token or delete it completely to avoid having issues with it later.
Going back to the campaign creation, now you will need to select a country to buy traffic from. For example, if the name of our campaign was “France Sweepstakes” now we’re selecting France from the menu below. I recommend not adding several countries per campaign as each country has different bids and volumes available. The platform will allow you to do so, but having separated campaigns for each geo is easier and more organized once you start the optimization process.
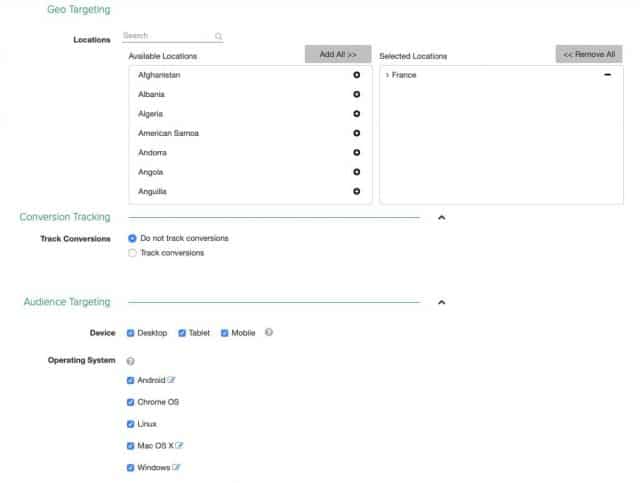
After that, you will have to select the device you want traffic from (as I mentioned before, I focus on mobile traffic so I select Mobile and Tablet).
You will also have to specify the Browser and connection type (useful for mobile content offers).
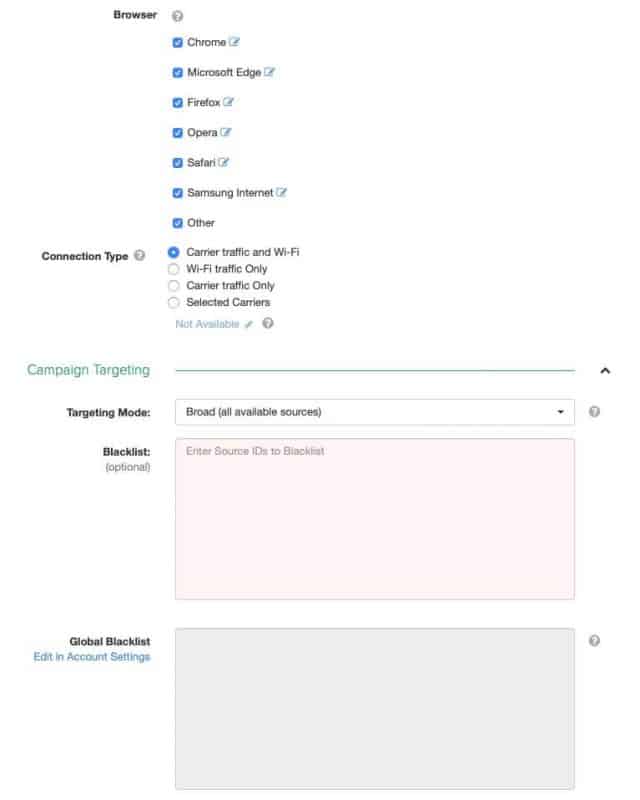
As for adding blacklists, you can skip this step until you have data to start optimizing your campaign.
SelfAdvertiser allows you to create global whitelists/blacklists in case you have a list of sites that you always want to block for all of your campaigns.
Your manager can also help you target by the city/state/zip code. It is not open on the platform, but if you’re interested, you should reach him out.
Finally, since we are buying push notification traffic you need to add a creative. This includes a Title, description, Icon, and Image.
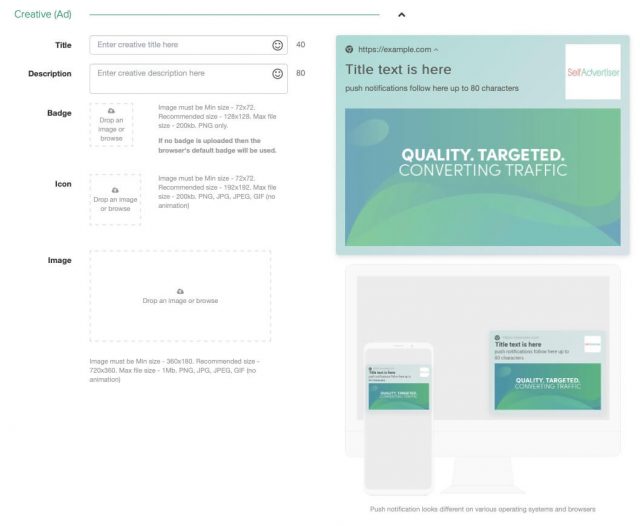
Keep in mind the most important thing to get a high CTR is the Title and Icon. The image is mostly shown in some phones when expanding the notifications and also with desktop traffic.
SelfAdvertiser is the only network so far I’ve seen that allows you to add a badge image, which replaces the small chrome browser icon at the top left section of the push notification. So far, I haven’t tested if it affects performance or not.
Finally, you can choose the frequency capping (I leave it at 24 hours) and day parting and you’re good to go.
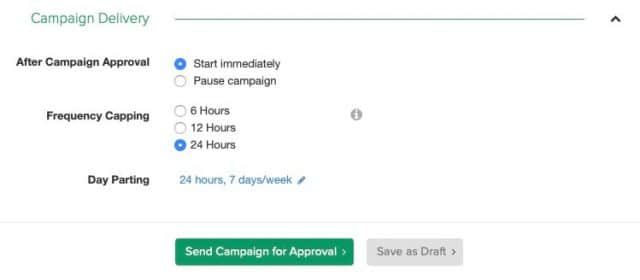
SelfAdvertiser usually takes from few minutes up to 12 hours to approve campaigns. It depends on your time zone.
SelfAdvertiser Campaign Stats and Optimization
Once traffic starts pouring in you can see the stats of your campaign by clicking on it.
You will see your campaign’s Dashboard with info about your budget, CPC, status and targeting along with a graph that shows the number of clicks and cost at the right side. Here’s a campaign I’m running at $50-100 per day to test their traffic:
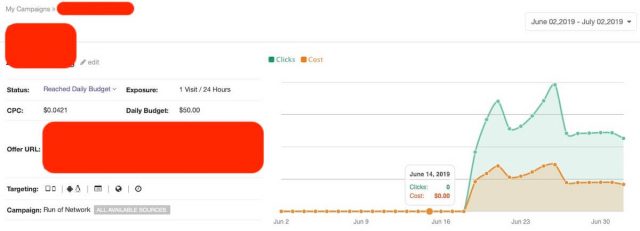
I recommend you to run a campaign for a few days before making optimizations to gather data properly. However, if you have a big budget you can gather data faster of course.
Below your campaign’s dashboard, you can see the sources (websites) that are sending traffic with the number of impressions and Clicks. This helps you analyze the CTR (remember I said the average CTR was around 0.5% at the beginning of the article based on SelfAdvertiser home page?) and costs.
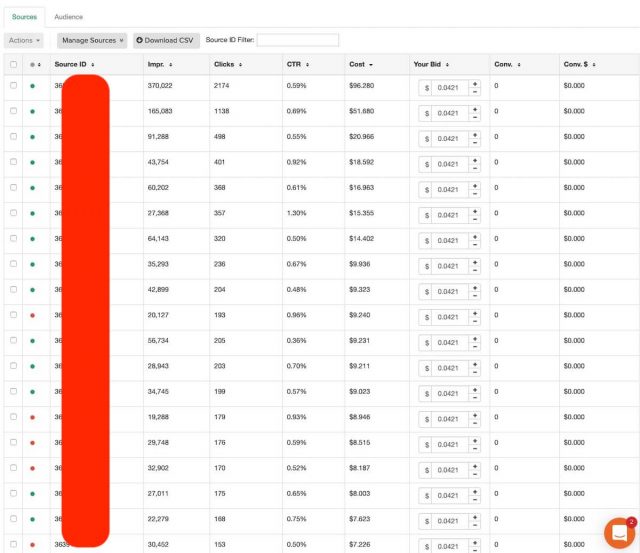
You can also pause the sources right there by clicking the green spot at the left side of each source ID and they will be marked as red and added to the blacklist of the campaign automatically.
This is how it looks in my Voluum’s tracker where I have data about conversions, CTR and more. If you take a closer look at the picture you can see my CTR from the lander to offer is quite good (around 15-20% in this campaign) and I’m using Voluum’s anti-fraud filter to check visits and clicks.
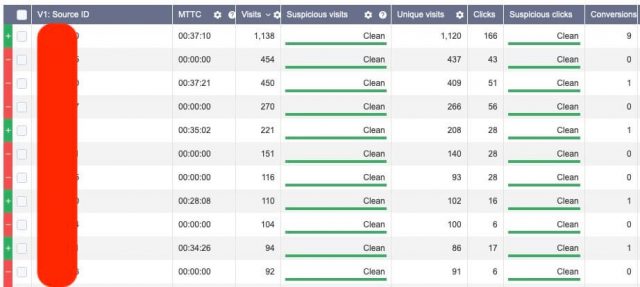
While on average I get 1-2% of bot/suspicious traffic from other push notification sources, so far with SelfAdvertiser I’m getting less than 0.5%. That’s low in terms of push notification standards but it probably doesn’t make much of a difference overall. Compared against pop traffic where we can easily get 10-40% suspicious traffic you could say push notifications are pretty clean.
Overall since SelfAdvertiser’s push traffic has been out for just a few weeks, I’m getting higher ROIs as the database is newer.
Volumes go up, competition goes up, prices go up to balance the field once more media buyers enter the market, so if you want to test their traffic it’s better to do it sooner than later.

Again, if you want to test SelfAdvetiser’s traffic you can get an extra 20% bonus in any deposit from $100 up to $500. Use the code “SERVANDOPUSH2019” at the checkout process.
This coupon works for everybody no matter if you’ve spent thousands at SelfAdvertiser before or you’re a new customer testing the push notification waters for the first time. Most coupons with other traffic sources are only for new customers. Take advantage of it and start making money and learning how to dominate push traffic ASAP!
P.S. Let me know if you have any questions in the comments below 🙂
Servando I like this theme where can I find it?
This is a theme from the Genesis Framework (StudioPress guys).
Glad you like it.
Are you running COD offers currently with self advertiser push ads?
Which region converts well with push Europe or Asia
Is this code only for push? Not for pops?
Hi Cloudia.
The coupon works for any type of traffic: push, pop, domain.
We just recommend it for Push as it’s a new source to test 🙂
Great! Thanks!