Lately, I’ve noticed some people inside the forum. Via email asking me about traffic sources that aren’t as popular or the default go-to, yet many affiliates manage to get profitable campaigns from it.
Clickadu is one of those traffic sources, and I just realized I had not blogged about it yet, even though I have been running campaigns with this traffic source since 2015 or 2016.
Let’s check it out!
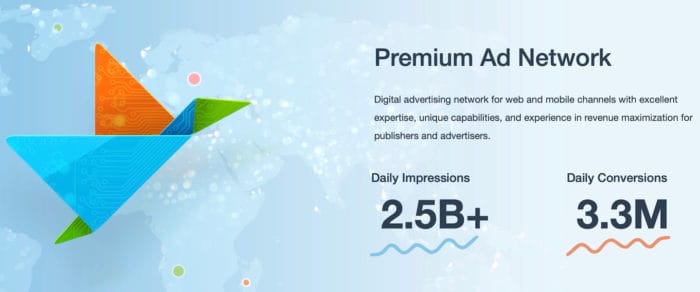
Clickadu is an ad network founded in 2014 with 2.5B+ daily impressions. As usual, when I started working with them, the only ad format available was popunder traffic, and the platform had a simple dashboard, but everything was managed.
Clickadu Ad Formats
However, since 2017, the SSP has been accessible, and they have slowly added more ad formats, including Push notifications, Instant messages, in-page push, video pre-rolls, and skim traffic.
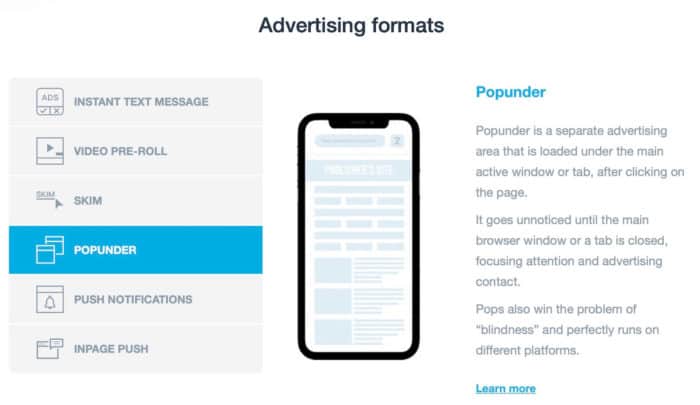
I have discussed popunder and push notification traffic many times in the last two years, so I’m sure most of you are familiar with them already. However, there are a couple of ad formats that aren’t as widely known.
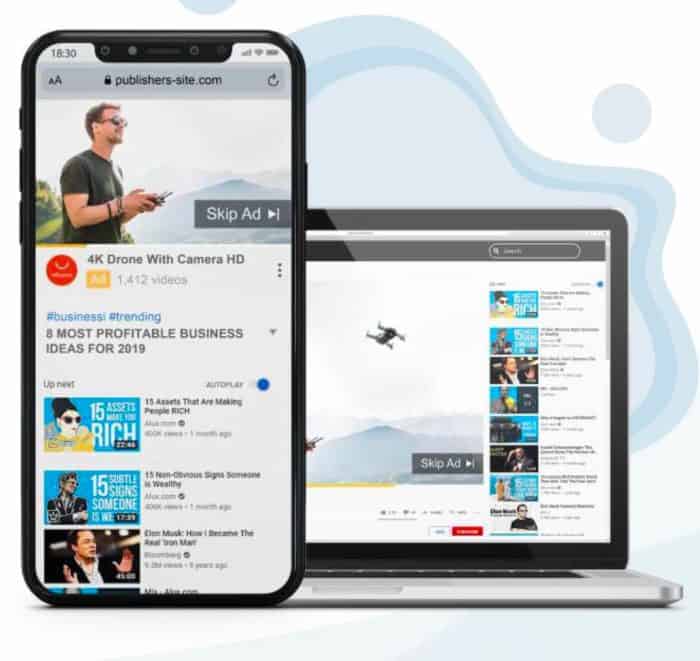
Video Pre-rolls are video ads shown before being able to watch any content. It’s kind of like when you’re surfing YouTube, and you get an ad just before a new video. Those can be skipped after a few seconds, so you might want to catch the user’s attention fast.
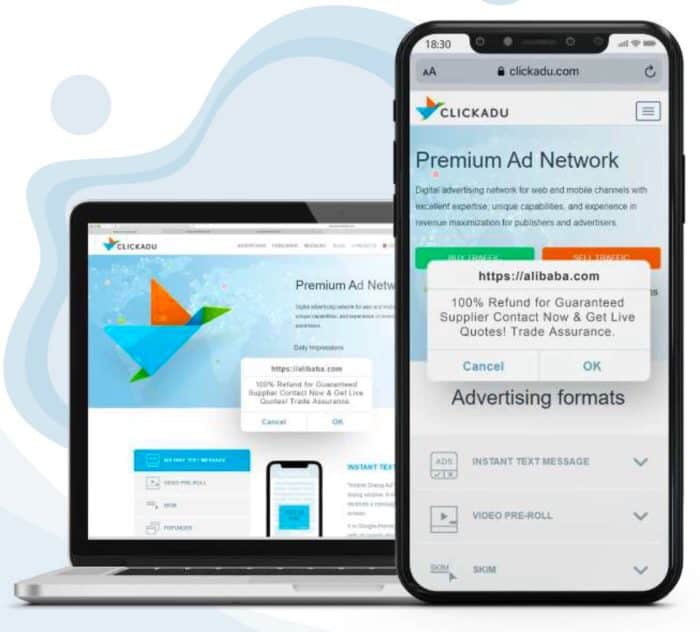
Another format I haven’t seen available in similar traffic sources is “instant text message“.
This looks like a notification from your phone, but in my opinion, it’s more like an interstitial message or something like that. The CTR can be pretty high as the user needs to interact with it before continuing.
Besides that, skim traffic seems to be traffic from links publishers place on their websites, but I haven’t tested that one out yet and can’t really comment on its performance or how targeted it is.
Finally, there’s this format called InPage push, which I’ve mentioned before in a couple of ad networks. However, the ad format is still pretty new, and you can’t find it on many networks yet, so let’s talk about it.
InPage push is a native push message appearing while a user is browsing a website. The main difference between InPage and regular push is that the notifications aren’t tied to a browser subscription, which means the same users won’t see the same messages over and over again, and also it can be displayed in any OS, including iOS and Apple devices.
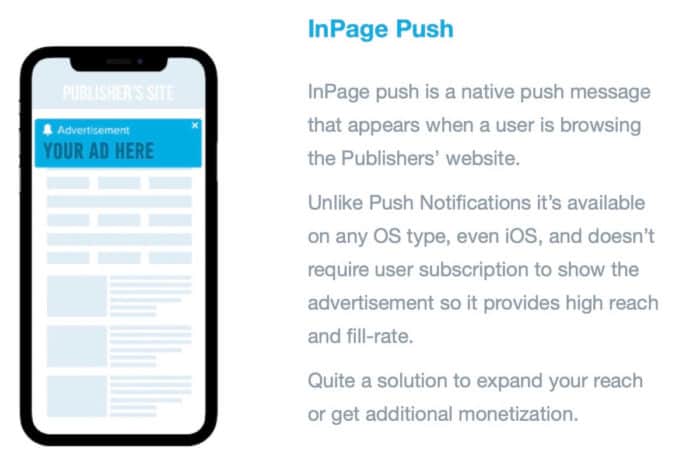
InPage push, in my opinion, is more like a mix of Push Notifications and Interstitial ads, and it’s looking like it could be a great year for this new ad format.
Clickadu is in the final stages of releasing a new ad format: banner ads. It will be available very soon for both advertisers and publishers, so stay tuned!
Clickadu – Dashboard
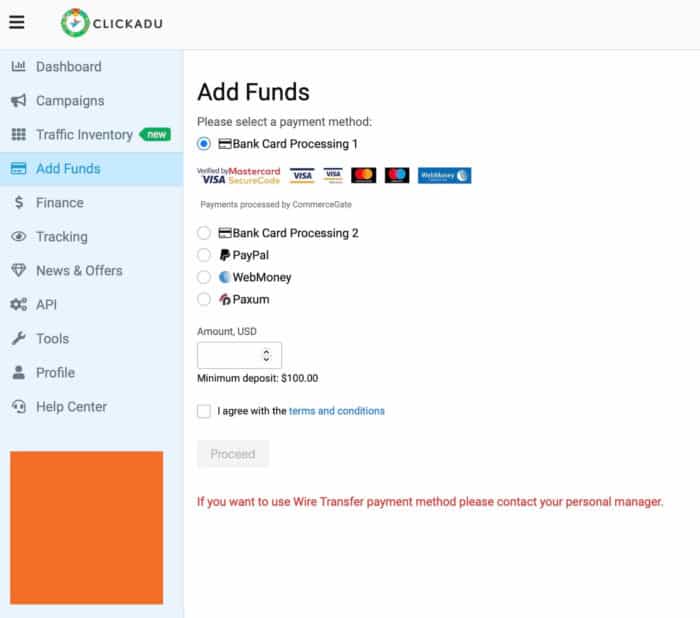
Once you’ve got an account, the first thing you need to do is add funds before launching a campaign. Clickadu offers several ways to fund your account, including:
- Credit card
- PayPal
- WebMoney
- Paxum
- Wire Transfers
After adding some funds, you’ll want to make sure your tracker is properly set up. If you want to send your postback data to the traffic source (e.g., for running SmartCPA campaigns), go to the tracking menu and select your tracker from the list to get your post back. If your tracker isn’t available, choose “other,” and you’ll need to customize the tokens based on what your tracker uses.

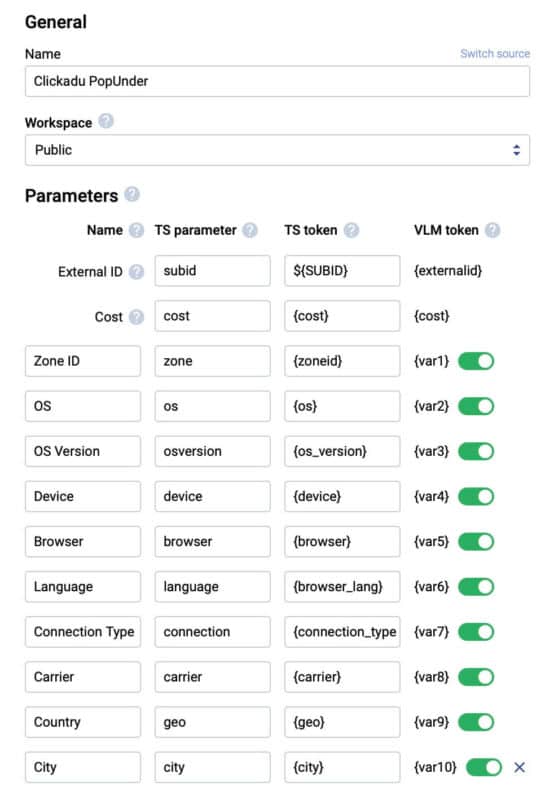
After that, you need to set up the dynamic tokens in your tracker to optimize your campaigns. Considering that Clickadu now offers different ad formats with different tokens, I recommend you create multiple templates (one for each ad format) to make things easier and focus on the main variables you want to track.
For example, in case you’re working with PopUnder traffic, this is how I set up my tokens:
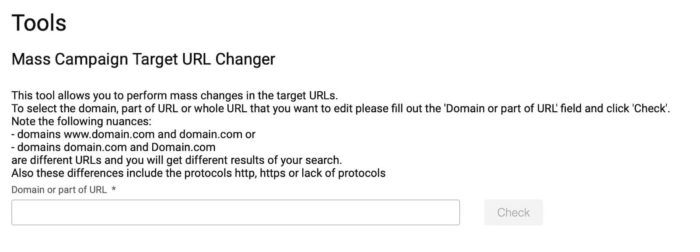
Another thing I found pretty interesting is this Mass URL changer. In case one of your tracking domains gets flagged, you can change all of the target URLs from your campaigns without having to edit them one by one. It’s a nice addition for sure!
OK, it’s time to create our first campaign. Assuming you’ve done your research beforehand and know what you want to promote, keep in mind you can always check the volume of traffic available in each traffic source to make plans.
Here’s the traffic distribution from Clickadu by continent:
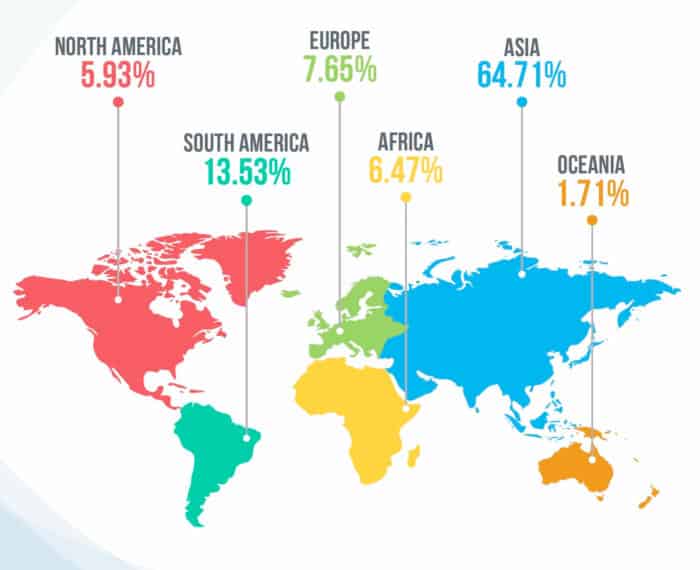
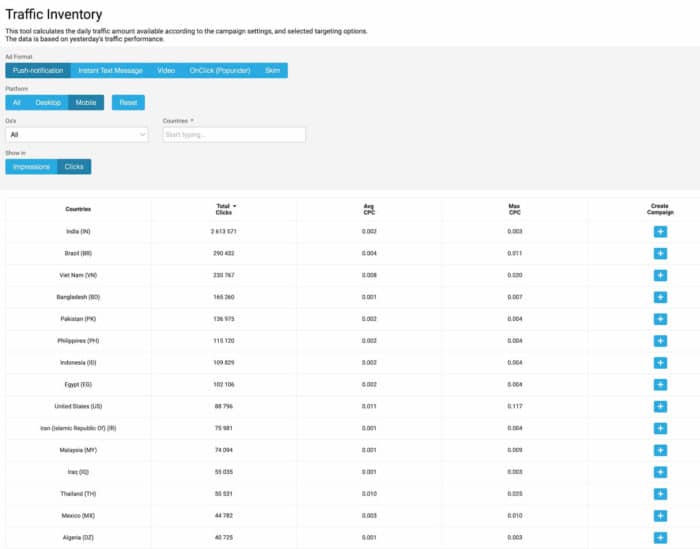
However, to get more exact numbers, you can find the traffic inventory option on the left menu of your dashboard, where you can filter the available daily traffic (based on the last 24 hours) by ad format, platform, OS, and country. Always try launching campaigns in the top 20 or top 30 geos of each ad format if you want to get enough volume and scale up.
Creating your first campaign
Let’s create our first campaign and go over all of the settings. I will create a popunder campaign in this example as it’s the fastest one (no banners), but all of the ad formats have a similar process except for the creatives and tracking tokens.
Once you push the “new campaign” button, the first thing you need to do is to fill in the general settings of your campaign. Here, you must give your campaign a name (e.g., USA – Dating – Desktop) and select the ad format.
Also, select a vertical for your campaign, input the target URL from your tracker, and click “next step.”
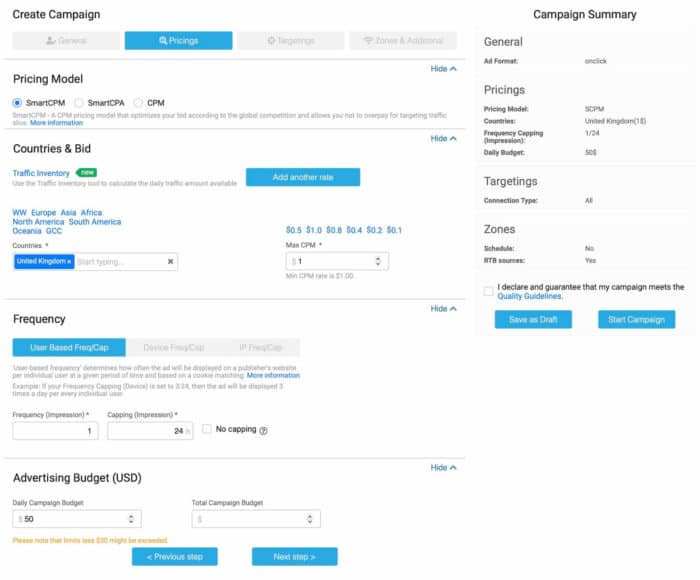
Now, you’ve got to set the pricing modem and bids. Here, you can choose between CPM, SmartCPM, and SmartCPA. For other ad formats, such as push notifications, you also have the CPC pricing model. Keep in mind that if you’re running SmartCPA, you need to set up your postback correctly from the tracker to the traffic source.
After that, select the country and bid (based on the traffic inventory research you did before) and finally set up a frequency cap. I like keeping it at 1-2 per day max. Then, you need to set a daily campaign budget, and you can add a total budget if you want, but I usually leave that blank.
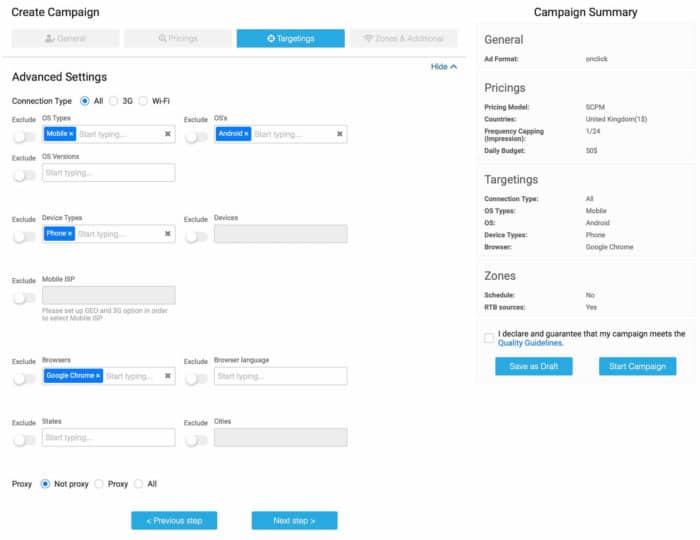
Now, we’re moving to the third tab, which is targeting. Here, you just need to include or exclude any filters you want to target, such as connection type, OS, device, ISP, browsers, and cities. If you leave any of them untouched, all of the traffic will be included.
Don’t narrow down your targeting a lot, or you’ll find a lack of volume unless you bid too high, especially if you’re just getting started and don’t have any previous data for your campaign.
Finally, you need to set up the Zones and campaign schedule. Leave the zones alone if this is a new campaign without previous data. Come back later once you’ve got data to exclude the zones that aren’t converting or create a whitelist campaign that includes just the working zones for you.
Also, you can set up a campaign schedule (not recommended initially), and after that, you’ve got to select whether you want to receive traffic from anti-adblock zones and RTB sources. I prefer leaving RTB out initially and running my campaigns only on Clickadu’s direct publishers, but that’s up to you.
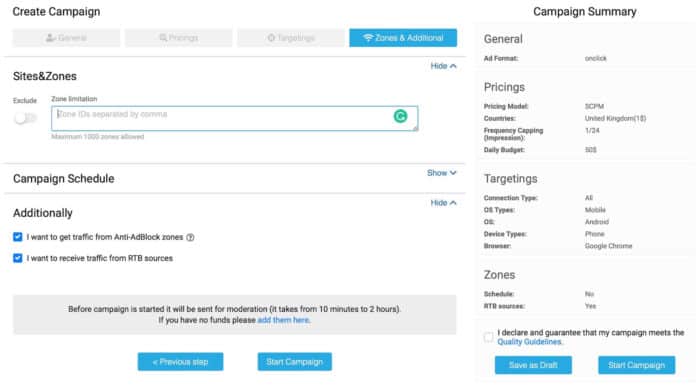
Save the campaign, and it will be sent for approval. After that, you’ll need to wait a few hours for it to be approved and start receiving traffic.
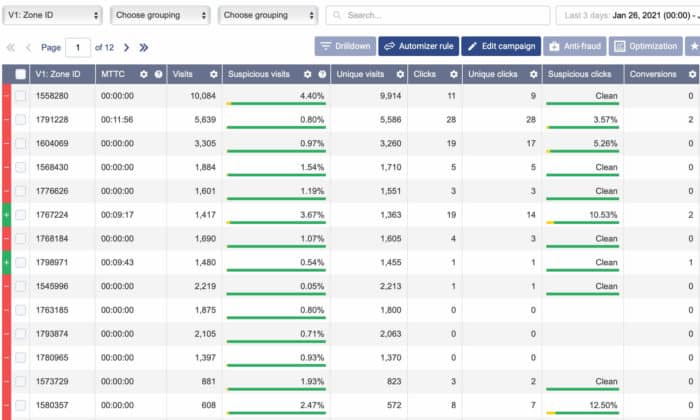
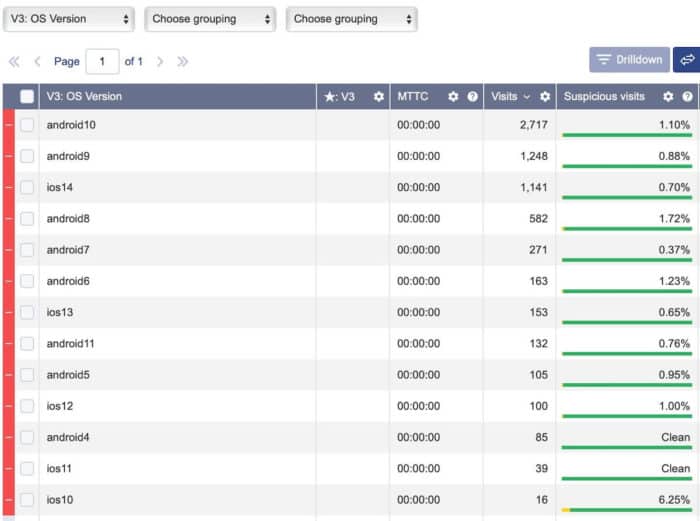
I recently launched a new RON campaign on Clickadu, and so far, it’s showing promising results (-40% ROI). Once you start getting the traffic, you’ll be able to break down your data based on the tokens you’re tracking, such as Zone IDs:
Or OS, device, carrier, city, etc:
Buy enough data and start blocking everything that doesn’t work for your funnel, and eventually, you’ll increase your ROI.
BTW, I also spoke with my manager and was provided with a whitelist (a bunch of Zone IDs with high performance) to run this campaign, and it looks like it’s going to have positive ROI in the first 48 hours, which is something you can always do if you talk to your manager.
Ideally, you need to give them information about your campaign, such as the geo, the vertical, and perhaps what kind of conversion flow it will have, and they can provide you with some data to get started. That puts you in a better position than most people starting with RON traffic.
Please leave any comments below if you have questions and I’ll talk to you in the next article!
Leave a Reply